
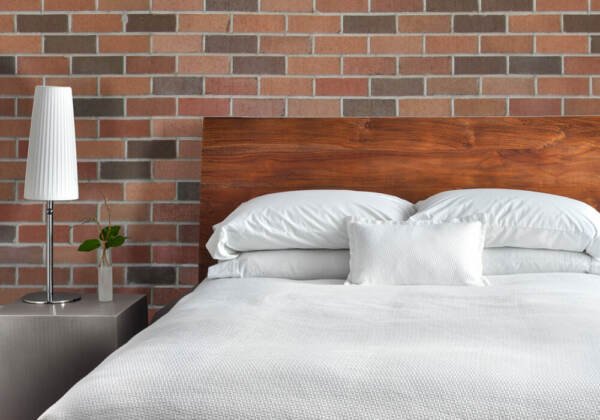
Royal Thin Brick, No Bricklaying Required
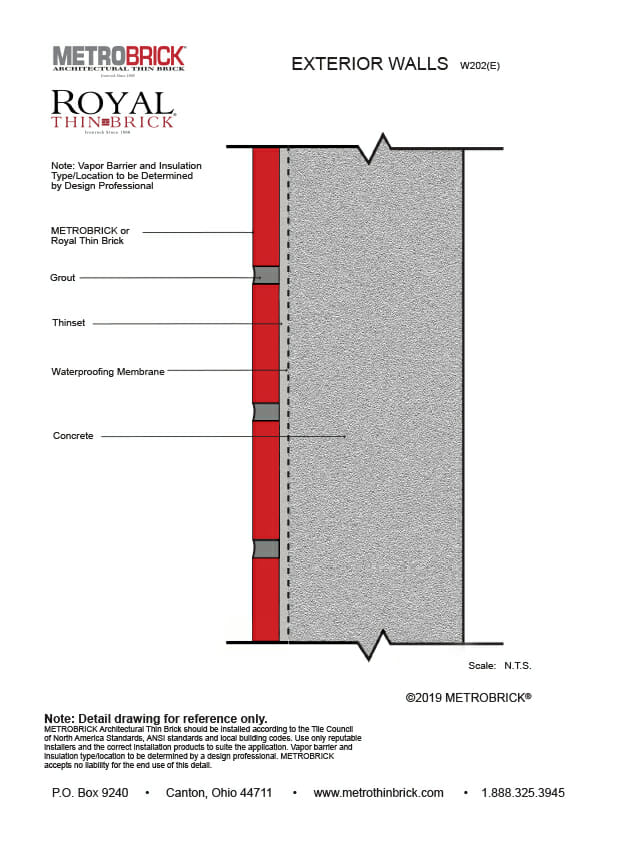
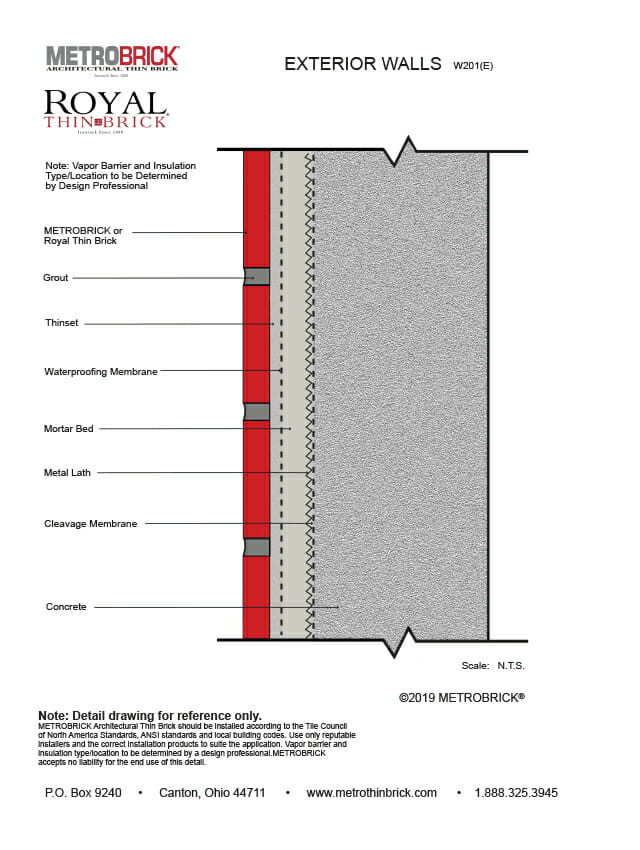
Royal Thin Brick can be installed on walls like ceramic tile using thinset mortar over a backer board or green board drywall, then grouted by the traditional float method or with a grout bag. No mason or experienced bricklayer is required. For vertical exteriors there are several installation methods based on the substrate. A popular installation includes attaching metal lath connected to a plywood substrate. Watch our installation video for this type of installation.*
Royal Thin Brick can also be used with field applied panel systems. The panels are mechanically attached to the wall with screws, and thin brick is then set on and glued to the panel. When the adhesive is cured the joints are filled with grout using a grout bag.**
Although the installation of Royal Thin Brick is comparatively easy versus the installation of full brick, it still is best to rely on professionals to ensure the brick is placed correctly the first time. It is accessible to DIY warriors but relying on experts is our recommended methodology.
*Consult local building code for regulations before installation.
**Consult the panel system manufacturer for installation instructions.
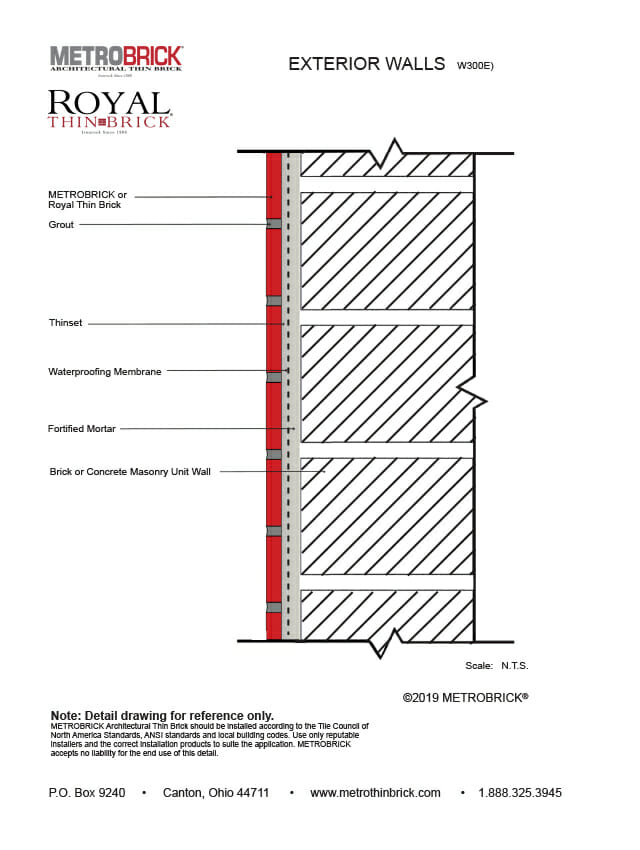
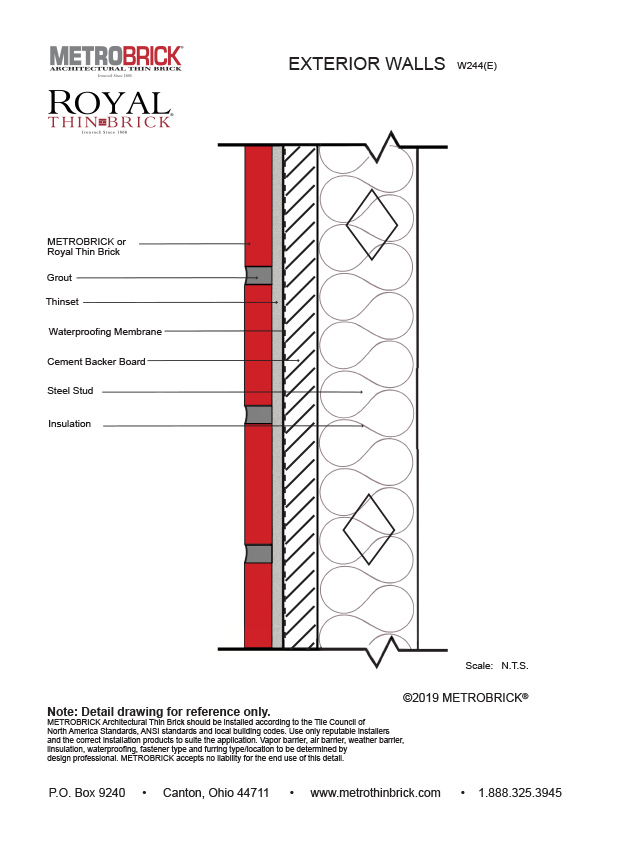
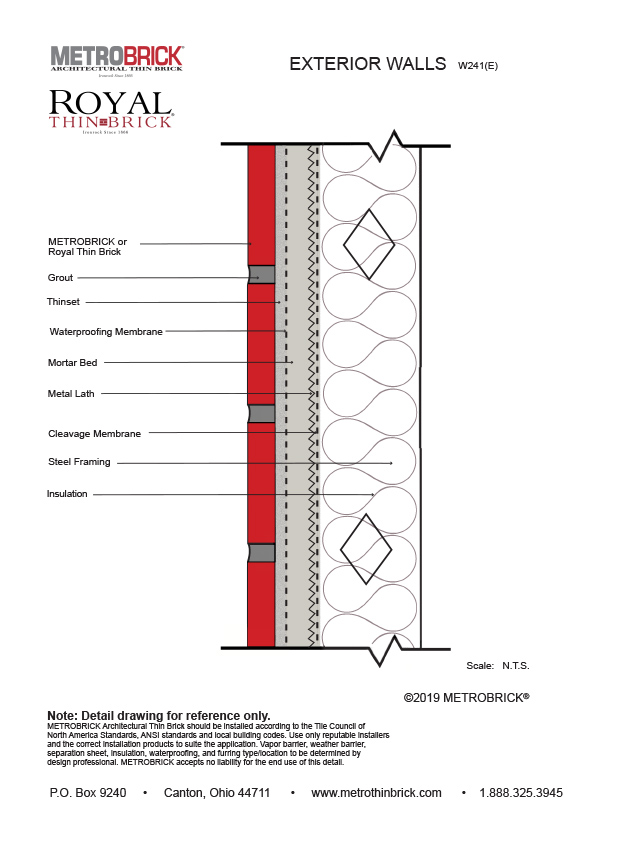
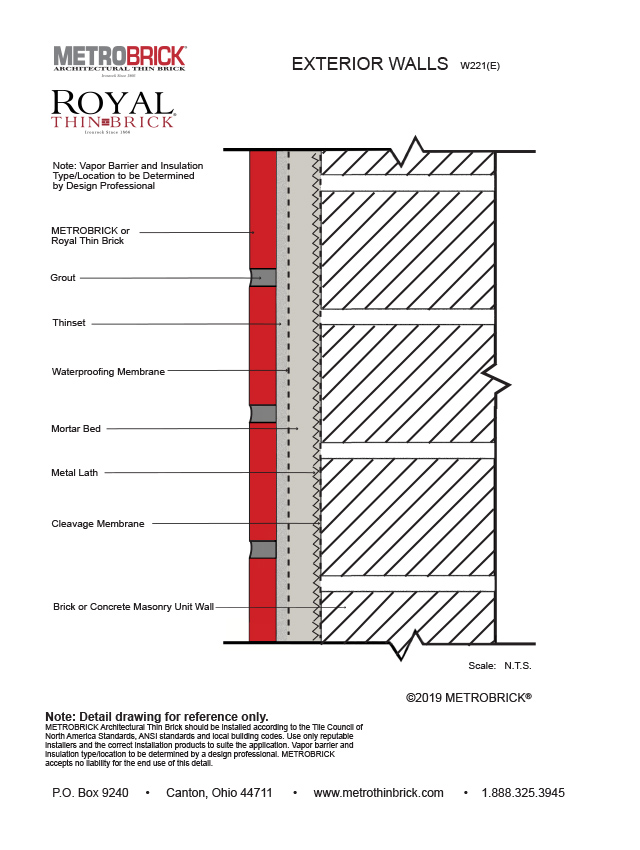
Details

Thin Brick Wall Installation Steps
 Begin by choosing the area where you are going to install the thin brick. Royal Thin Brick® installs much like tile. Always check with local building codes to make sure all materials meet codes and requirements. Consult the installation materials manufacturer and the Tile Council of North America’s Tile Handbook for details on installations.
Wet areas and areas outdoors will require more preparation for installation. Some installation areas are best left to the professional tile installer.
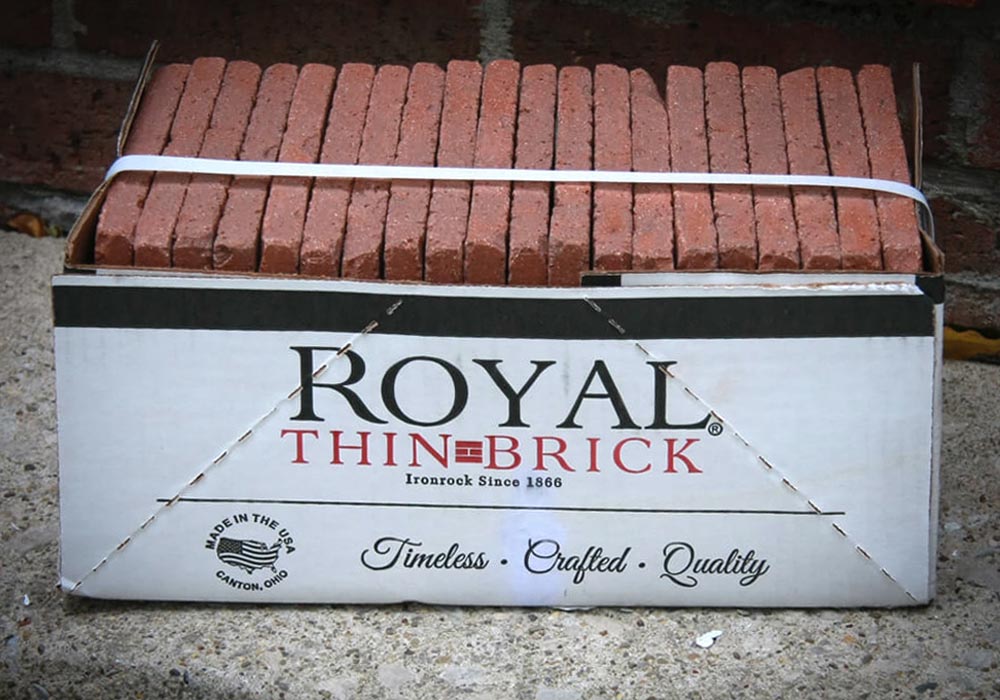
Determine how many bricks you will need for your project. Each box of Royal Thin Brick® contains approximately 6.5 sq. ft. of bricks.
You will need the following to install your bricks:
- 2”x4”(s) and screws to hang it
- Level
- Chalk line
- Grout bag
- Dowel rods/tile spacers (3/8”)
- Heavy-duty drill (to mix material)
- Drill mixing attachment
- Notched trowel (3/8”)
- Tile sponges
- Hard bristle brush (not wire)
- Thinset or adhesive
- Grout
- Bucket(s)
- 3/8” brick joiner tool or large dowel rod
- Small trowel
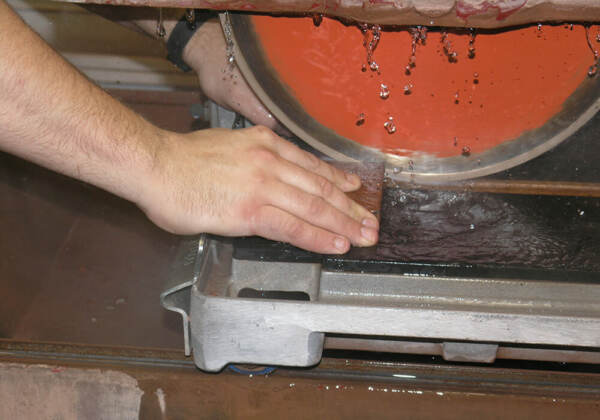
- Wet saw or heavy duty tile cutter
- Rubber gloves
Note: If floating the grout instead of using a grout bag, you will need a tile float instead of a grout bag and joiner tool.

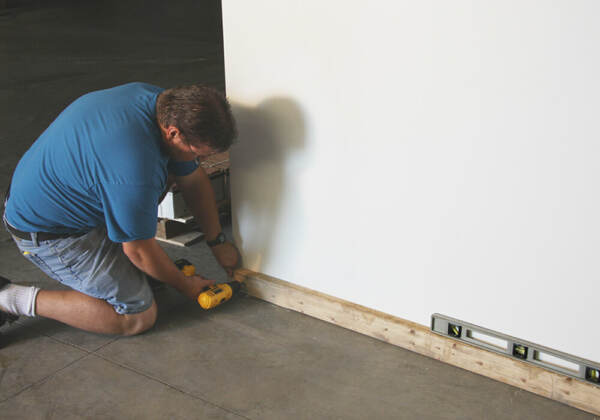
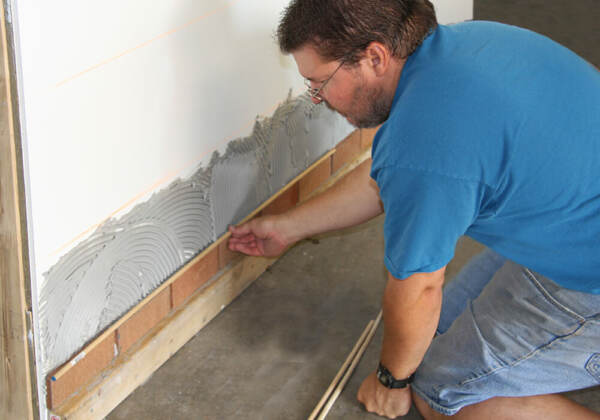
Install the 2”x4”(s) the full length across the bottom of your wall using a level to make sure your wall is straight. You may decide to use 2”x2”(s) if you want your wall to start closer to the floor. Make sure the board or boards you use are straight. This will be the starting point for your wall and will hold the weight of the bricks until the adhesive dries, so place a screw at each stud. Once your wall is complete you will remove this ledge and attach the trim for your room.
Place a screw at each stud.
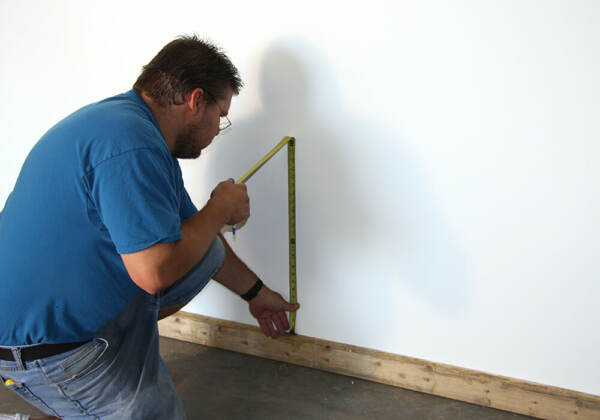
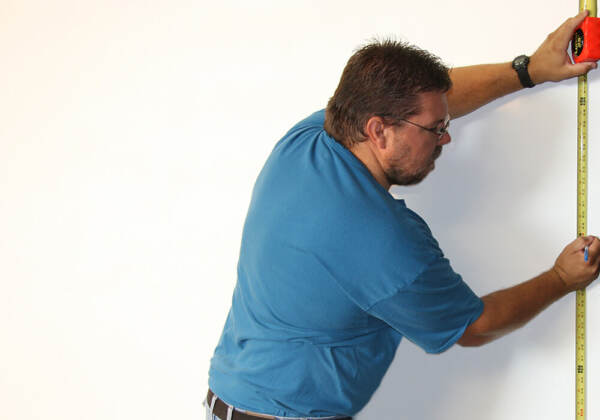
Measure up one foot from the ledge and snap a horizontal line with a chalk line. Continue working up the wall every foot marking lines as you go. Make sure these lines are parallel with the bottom ledge. These lines will be a guide letting you know everything is level as you brick up the wall.
Work up the wall every foot marking lines as you go.
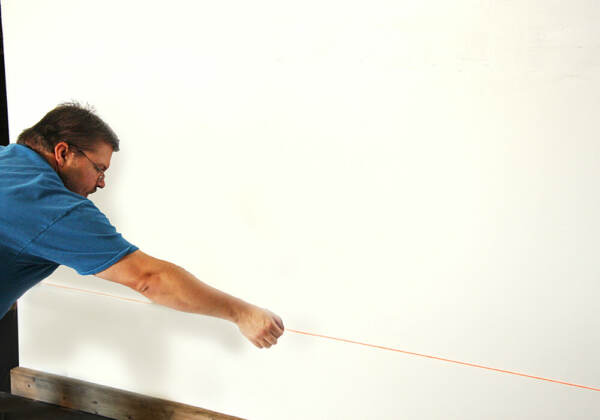
Snapping the chalk lines.
 You will need to cut bricks for the left and right ends of your wall beginning with the half pieces (kerfs) that will begin your second row of bricks.
Note: Take into account the grout joint when cutting kerfs. They are not just bricks cut in half. The kerf size for Royal Thin Brick is 2 3/4” x 3 5/8”.
You can either calculate and make all of your cuts ahead of time or you may want to cut the bricks as you work your way up the wall. Often, walls aren’t square so it may be best to cut as you go.
You will want to start bricking your wall on the end that will be a focal point because that end will have full pieces and true (kerfs) half pieces.
As you come to the other end of the wall you will be able to determine the cuts that need made there.
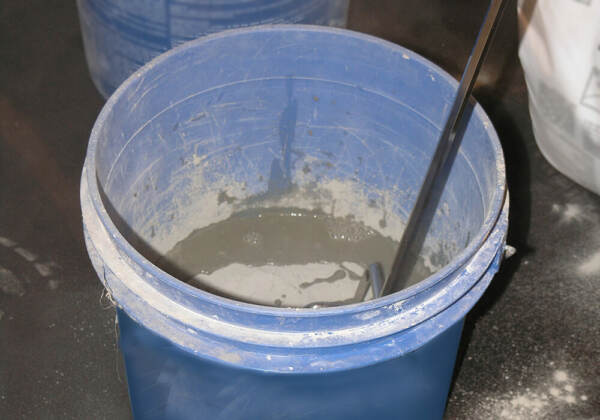 If installing with bagged thinset, mix thinset mortar per the manufacturers instructions. Using a mortar mixing tool and a heavy duty drill will make this job much easier. Only mix up enough thinset as you can easily use before it begins to cure. Mix up smaller batches at first until you begin to see how much you can use at one time.
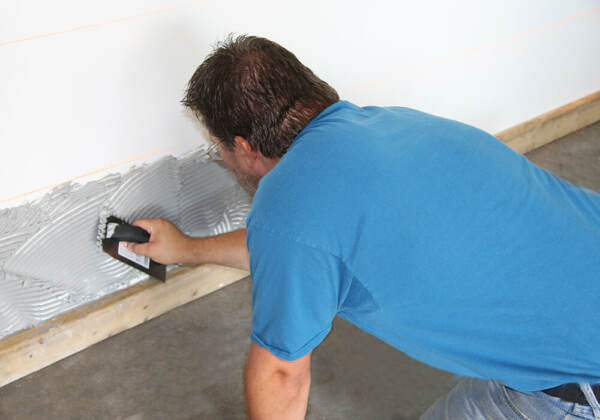 Choose a bottom corner of your wall at the wood ledge you installed to begin troweling on adhesive. Trowel on only as much adhesive as you can easily apply bricks to before it begins setting up.
Hold the notched trowel at a 45° angle to create deep grooves for holding the brick.
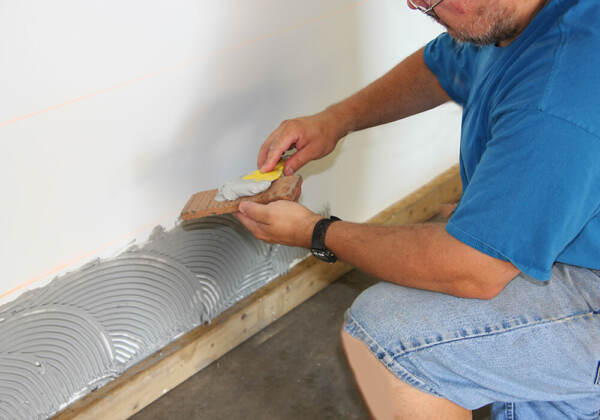 Begin pushing bricks into the adhesive. You may choose to back butter bricks to help with adhesion. When back buttering, use a small trowel to smooth a thin layer of mortar on the bricks don’t use too much.
 You will want to press the bricks firmly into the adhesive with some pressure to make sure you have a good bond.
You can poke a 3/8″ dowel rod or tile spacer in the vertical gap between bricks as you go along to give the right spacing.
The use of 3/8″ dowel rods laid on top of the row creates the right spacing for the bricks and supports the next row. You may also choose to use 3/8″ tile spacers.
Note that when using dowel rods, once the adhesive has hardened, dowel rods may be difficult to pull out because of the weight of the bricks and because they may stick to excess adhesive. This is especially true on the lower part of the wall. To help remedy this we recommend not positioning dowel rods at the back of the joint but instead more toward the front.
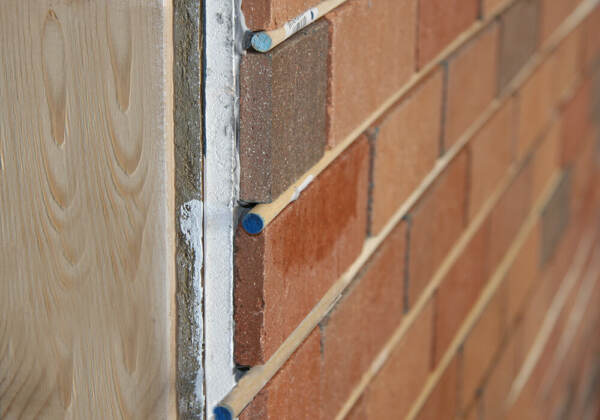 This picture shows how to place dowel rods to minimize difficulty in removal. You can see the cut kerf brick at the wall’s end.
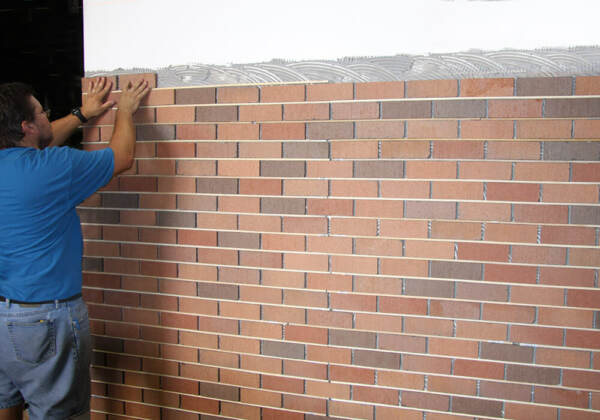

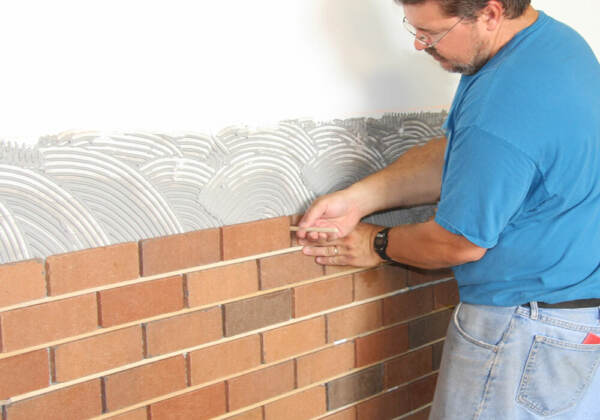
This view shows how your wall should look as you are working your way up it.
Continue applying thinset adding rows of brick until you come to the top of your wall. Once at the top you may need to cut your final row to make it fit. One option you may want to try is to install a soldier course (vertical row of bricks) at the top of your wall. This may be especially desirable if your final row is going to be a thin strip of bricks.
Above is an example of a Soldier Course.
 After the adhesive has set up to the point that it will hold the weight of the bricks (usually the next day) carefully remove the dowel rods and spacers.
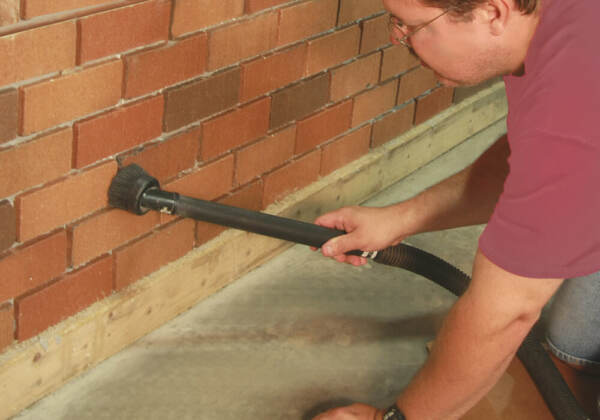 Once the wall is installed and the dowel rods and spacers have been removed, it is a good idea to vacuum off any dust and debris before grouting. Because Royal Thin Bricks are tumbled they come out of the cartons dusty. Vacuuming the bricks will help keep any contamination from getting in the grout.
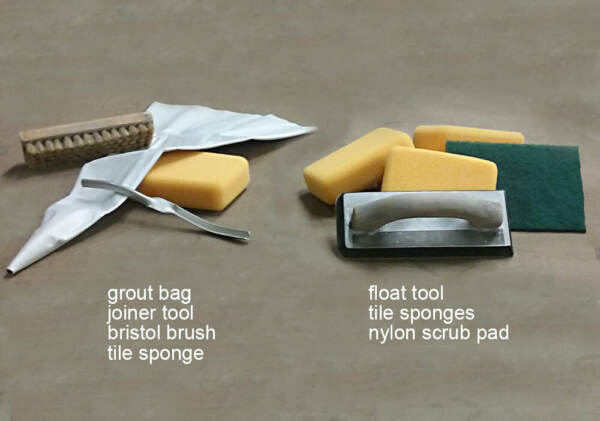 At this point in the process it is time to grout your Royal Thin Brick wall using sanded grout. You have two options to choose from for grouting your wall.
You can use a float tool to float the grout into the joints just like you would tile. This method involves pushing the grout into the joints by ‘floating’ the grout over the surface of the wall and cleaning off the excess grout with repeated sponging. Again, this is the method used when grouting tile.
The other method of getting the grout in the joints involves using a grout bag. Since it is the less familiar of the two applications, it is the one we are going to show for the remainder of this tutorial.
Note: Grouting with a tile float and sponges gives a different look than using a grout bag. How you want your wall to look will help determine the method you choose. Also remember grout color plays a much larger role in the look of the bricks when they are floated since grout residue is left in the crevices on the surface of the bricks.
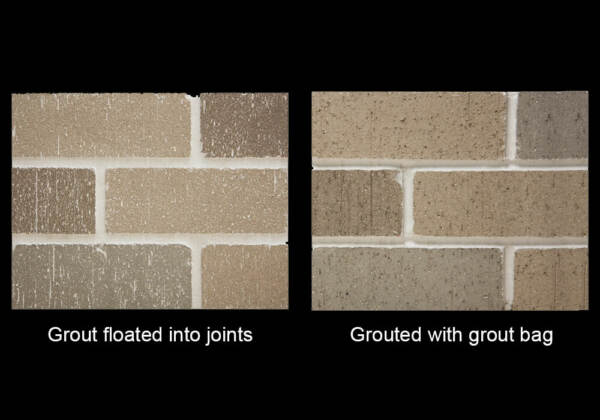 These images show a wall section grouted with a tile float, left and a grout bag, right.
The remaining grout on the surface and the nearly flush to the surface joints shown in the grout float method – left, creates a different appearance than the grout bag and struck joints of the wall shown on the right.
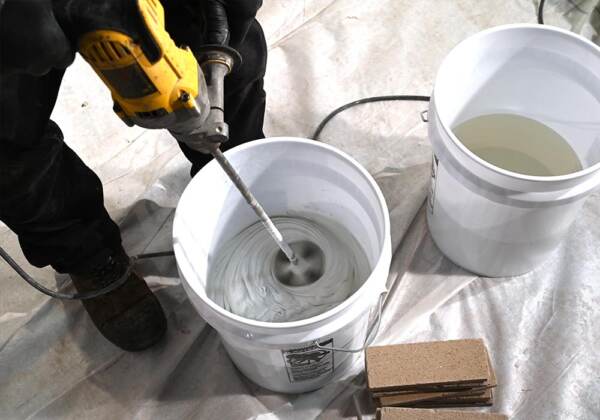 Mix up the sanded grout of your choice. You may also choose to use pointing mortar. Mix the grout a bit thinner (somewhat like cake icing) when using a grout bag, Do not mix more grout than you can easily use with a few fills of your grout bag as it will harden. Always follow the manufacturer’s instructions when mixing grout.
Note: Choose your grout color carefully because different grout colors can change the appearance of the wall.
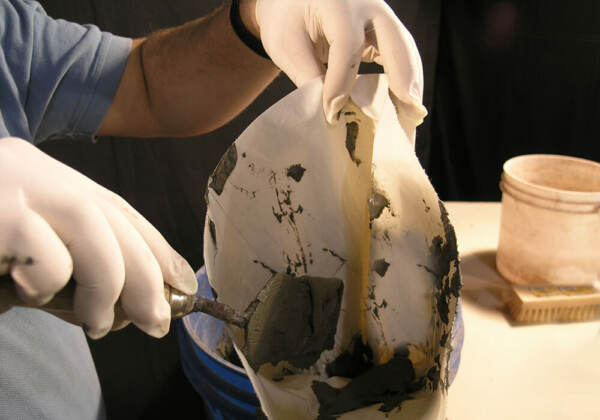 Wet the inside of a grout bag to help in starting the process. Scoop grout into the bag using a small trowel. Begin by scooping a small amount, two to three scoops, until you know how much works best for you.
Twist the bag closed similar to how you would a cake icing bag. Squeeze the bag into your grout bucket to get air out and start the grout flowing.
If the grout is clogging the bag add a bit water to your bucket to get the right consistency.
As you work on the wall, from time to time you may need to rinse hardening grout out of the bag to keep it from clogging.
Note: Some grout bags are designed to allow you to cut more of the tip of the bag off to increase grout flow. Cutting too much however could cause improper filling of the joints and make it harder to clean up.
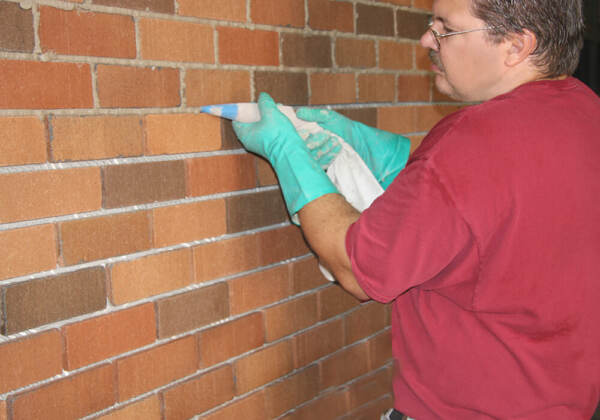 Place the tip of the mortar bag into the joint. Begin squeezing grout into the joints between the bricks. Start at the top of the wall and work your way down. Fill the vertical joints first, coming back to fill in the horizontal joints. Work the bag across the joints as you are twisting the bag to squeeze grout out. Fill the joints as neatly as possible and completely fill (but don’t overfill) the joints. This will make clean up much easier.
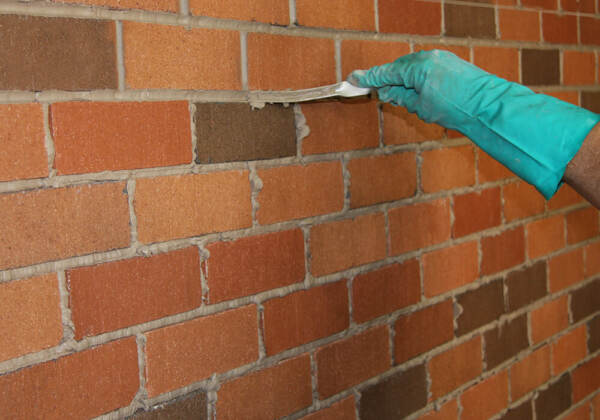 Use the jointer tool (you can also use a large dowel rod) to strike the joints as shown at left. If you are doing a large wall you will do a section and then go back and strike it. Waiting until the surface grout is slightly hard before striking will cause the grout to clump more and cause less smearing.
Note: Pay close attention to the instructions provided by the grout manufacturer for curing times as these will vary. Waiting too long to strike the joints will make it difficult, even impossible, to remove the excess grout.
 After striking an area you can go back with a wet tile sponge and clean up any areas where grout has gotten on the face of the brick. Use a clean sponge and avoid touching the joints to keep the grout from smearing.
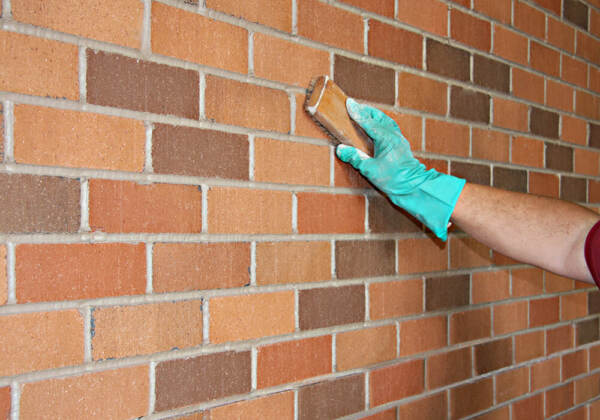
The last step after joining is to wipe across the surface of your new Royal Thin Brick wall with a bristle brush to knock off any grout that might be left hanging after striking.
Once the grout has had a chance to cure you may want to enhance the color of the bricks and help protect it with a paver enhancer product.
Thin Brick can also be installed on a floor such as an outdoor porch or patio. Click here to learn more.
